1
Install and Start Development Server
Start the development server using the QStash CLI:The QStash CLI output will look something like this:For detailed instructions on setting up the development server, see our QStash Local Development Guide.
QStash CLI Output
2
Enable Local Mode on Console
Once you start the local server, you can go to the Workflow tab on Upstash Console and enable local mode, which will allow you to monitor and debug workflow runs with the local server.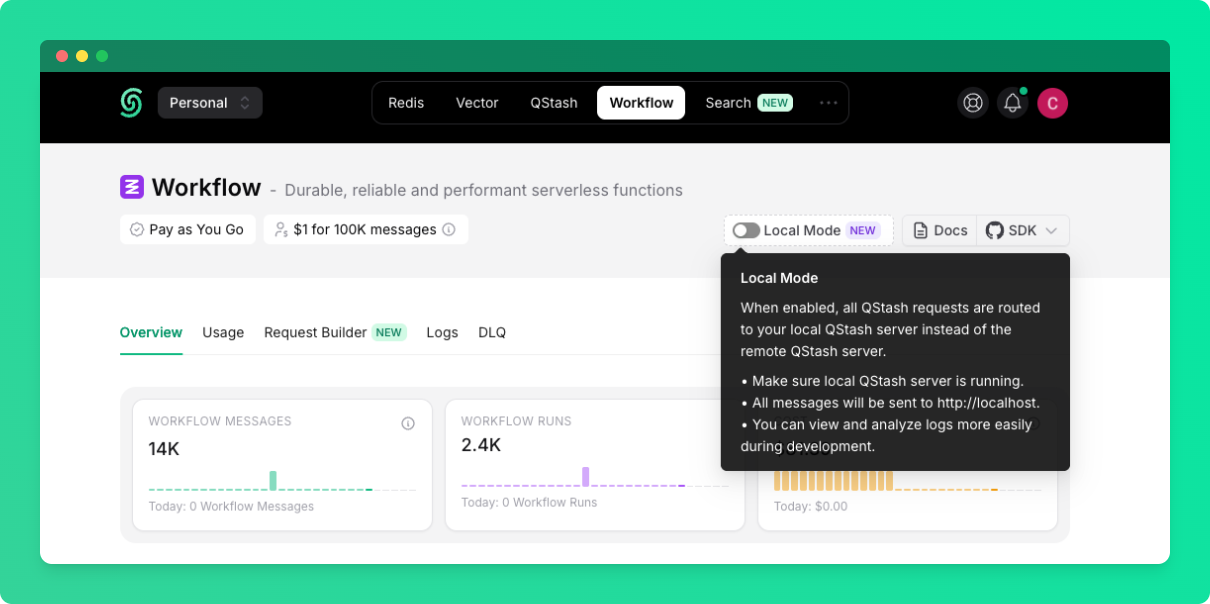
3
Update Environment Variables
Once your development server is running, update your environment variables to route QStash requests to your local server.
4
Use local addresses
It’s all set up 🎉Now, you can use your local address when triggering the workflow runs.
Inside the
trigger() call, you need to provide the URL of your workflow endpoint:- Local development → use the URL where your app is running, for example: http://localhost:3000/api/PATH
- Production → use the URL of your deployed app, for example: https://yourapp.com/api/PATH
BASE_URL constant and set it based on the environment.
A common pattern is to check an environment variable that only exists in production: